Price:
1140.00 €
Excl.Tax (20%)
Reviews: 1
Available: Yes
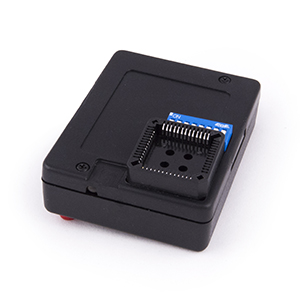
SMART Key Teach-in device User Manual
1. Supported features
This key-learning device supports SMART 450,451,452 .
All you need is a prepared key for SMART and for some models
you must use a prepared by Abrites transponder.
“Key Synchronization over K-Line”
Automatically establishes a diagnostic session with the SAM unit
and performs synchronization of all available keys over K-Line.
“Key Synchronization over CAN”
Automatically establishes a diagnostic session with the SAM unit
and performs synchronization of all available keys over CAN.
“Start the car without a working transponder”
This mode is useful when you do not have a working transponder
and you wish to move the car. The car can only be started once
when this mode is activated.
2. Using the device
The device is easy to use and requires minimum user intervention.
Any information, that is required from the user before starting to use the device
can be provided by using the 8 switches, placed on the device. The user can set
the operation mode of the device by setting the switches in different positions.
For each functionality a specific combination of the positions of the switches is
required before starting to use the device. Any feedback from the device to the
user is provided, by using the green, red and yellow LEDs placed on the device.
More information can be found below in this document.
Please, read the information that follows before using the device!
3. Using the features
The 2 key synchronization features, can be activated individually using switches 1 and 2
placed on the device.
Activated feature Switch 1 position Switch 2 position Switch 3 position
“Key learning over K-Line”
“Key learning over CAN”
“Start the car without a
working transponder”
ON OFF OFF
OFF ON OFF
OFF OFF ON
“Key learning procedure over K-Line”
- Setup
This mode should be used for SMART vehicles, produced up to year 2005. For using the
device's “Key learning over K-Line” feature, switch number 1 should be placed at position
ON. The rest of the switches are not used in this case.
- Usage
To start the key synchronization procedure you must first have prepared an
appropriate key. You must insert this key into the Ignition Switch and turn Ignition
ON.
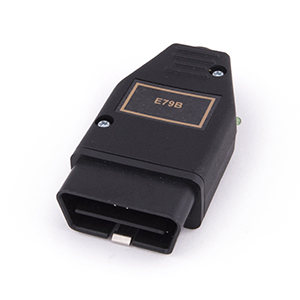
Then put switch 1 to position ON and plug the key-learning device into the OBDII
port of the vehicle.
By doing this the device is activated and starts doing it's job.
*If the LEDs on the device do not start blinking you must check the setup and
repeat the procedure.
- Key Synchronization
After the device is plugged in the OBDII port it performs the following functions:
- Automatically establishes a diagnostic session with the SAM control unit and puts
the SAM control device in a key-synchronization mode.
- At some point the yellow and green LEDs on the key-learning device will go OFF.
At this point the Key LED on the dashboard should start blinking fast. You need to
switch Ignition OFF at this moment.
- If your key has more than 1 buttons - press the 'CLOSE' button twice within 30
seconds. If the key is successfully registered, the Key led in the dashboard must go
off for about 2 seconds and after that will continue blinking again.
If your key has only 1 button - press it twice within 30 seconds.
ATTENTION: You must synchronize all the keys you have, otherwise you cannot start
your car with non-synchronized keys!
- After the 30 seconds have elapsed – the green and yellow LEDs on the key
learning device will start blinking simultaneously (for 2 seconds they will both be ON
and for 2 seconds they will both be OFF). This means that the Key-Learning
procedure has finished successfully.
- Now, you must confirm that all keys are synchronized by trying to start the
vehicle's engine with each one of them. If for some reason one or more of the keys
are not correctly synchronized – you can repeat the procedure.
- Indications to the user
Any feedback from the device to the user is given by the red, green and yellow
LEDs placed on the device.
The red LED should be constantly on, indicating that the device is powered. The
green and yellow lamps provide different information:
- asynchronous blinking of both the green and the yellow LEDs indicates data
flow(incoming and outgoing) between the key-learning device and the SAM unit in
the vehicle.
- if communication has occurred - the yellow and green LEDs will go OFF– this
means that the user should switch the Ignition OFF and start synchronizing the
keys.
- continuous blinking of the green LED only indicates that there is no data flow
in the moment, but the device is still working.
- continuous synchronous blinking of the the green and yellow LEDs (2
seconds ON and 2 seconds OFF) indicates that the procedure has finished
successfully.
“Key learning procedure over CAN”
- Setup
This mode should be used for SMART vehicles, produced after the year 2005. In
order to use the “Key learning over CAN” feature, switch number 2 should be
placed at position ON.
Please note that if you want to synchronize 1 key only – you don't need to use any
of the other switches.
However, if you would like to synchronize more than 1 keys in this mode, you must
also use switches 5 and 6.
The table below shows how to set-up switches 5 and 6, in case you want to
register more than 1 keys:
SWITCH-5 SWITCH-6 Number of Keys
OFF OFF 1
ON OFF 2
OFF ON 3
ON ON 4
-Usage
To start the key synchronization procedure you must first have prepared an
appropriate key as well as a transponder.
You must use a prepared by Abrites transponder.
You must insert this key into the Ignition Switch and turn to position Ignition ON.
Then put switch 2 to position ON and plug the device into the OBDII port of the
vehicle.
By doing this the device is activated and starts doing it's job (see
“Indications for the user” chapter below).
Observe the indications – if the LEDs on the device do not start blinking you must
check the setup and repeat the procedure.
-After that if you want to learn further keys, you must exchange the key inthe Ignition Switch and again wait for the yellow and green LEDs to go OFF. Theignition must be switched ON again in no more than 20 seconds, otherwise theteach-in process will be aborted.-It is very important to carefully observe the indications, that the green andyellow lamps provide to you!Any time when the yellow and green LEDs are OFF, you must switch the Ignition OFF!Any time when the yellow and green LEDs are ON, you must switch the Ignition ON!-Confirm that all keys are synchronized by trying to start the vehicle'sengine with each one of them.
- Indications to the user
Any feedback from the device to the user is given by the red, green and yellow
LEDs placed on the device.
The red LED should be constantly on, indicating that the device is powered. The
green and yellow lamps provide different information:
- asynchronous blinking of both the green and the yellow LEDs indicates data
flow(incoming and outgoing) between the key-learning device and the SAM unit in
the vehicle.
- if communication has occurred - the yellow and green LEDs will go OFF– this
means that the user should switch the Ignition OFF and start synchronizing the
keys.
- continuous blinking of the green LED only indicates that there is no data flow
in the moment, but the device is still working.
- continuous synchronous blinking of the the green and yellow LEDs (2
seconds ON and 2 seconds OFF) indicates that the procedure has finished
successfully.
- Key Synchronization
After the device is plugged into the OBDII port, it performs the following tasks:
- Automatically establishes a diagnostic session with the SAM control unit over
CAN and puts the SAM control device in a key-synchronization mode. - Within only a few
seconds the yellow and green LEDs on the device will go OFF. At
this moment you must switch the Ignition OFF and then ON again. ATTENTION: You must
switch the Ignition ON again within 20 seconds, otherwise the teach-in process will be aborted.
“Starting the car without a working transponder”
- Setup
This mode should be used for SMART vehicles produced after the year 2005.
For using the “Starting the car without a working transponder” feature, switch
number 3 should be placed at position ON. The rest of the switches are not
used in this case.
- Usage
To start the car without a working transponder you must first have prepared an
appropriate key. You must insert this key into the Ignition Switch and turn to
position Ignition ON.
Then, put switch 3 to position ON and plug the key-learning device into the OBDII
port of the vehicle. By doing this, the device is activated and starts doing it's job.
Observe the indications – if the LEDs on the device do not start blinking, you
must check the setup and repeat the procedure.
The procedure takes about 5 seconds and then the car can be started.
Continuous synchronous blinking of the the green and yellow LEDs (2 seconds
ON and 2 seconds OFF) indicates that the procedure has finished successfully.
Supported models: SMART 450, 451, 452